Invoice & Estimate with Alto is a powerful tool that helps entrepreneurs manage the invoicing process. It addresses the challenges that today’s users face by ensuring a secure and efficient exchange of documents with your business partners and clients.
Alto e-invoicing is user-friendly and combines many useful features with advanced functionality. In this series, we walk through the app and explain it.
- App Walkthrough Part 1: Clients
- App Walkthrough Part 2: Settings
- App Walkthrough Part 3: Invoices
- App Walkthrough Part 4: Projects
- App Walkthrough Part 5: Vendors & Expenses
- App Walkthrough Part 6: Estimates
- App Walkthrough Part 7: Reports
App Walkthrough Part Six: Estimates
A competent and thorough project estimate is an important part of winning new business. Invoice & Estimate with Alto provides a solution that allows you to streamline the process of creating and reviewing estimates, and then quickly converting them into invoices.
Creating an estimate is very similar to creating an invoice. A client and project are selected, items and their costs are added, and an estimate is created and emailed to the customer for review.
If the client wants to make changes to the items or costs, the estimate can be easily modified. And when the customer approves your quote, you can convert it to an invoice with the click of a button.
Create an Estimate
Let’s go to the Invoices and Estimates screen and select the Estimates tab. Here you will see a list of all existing estimates.
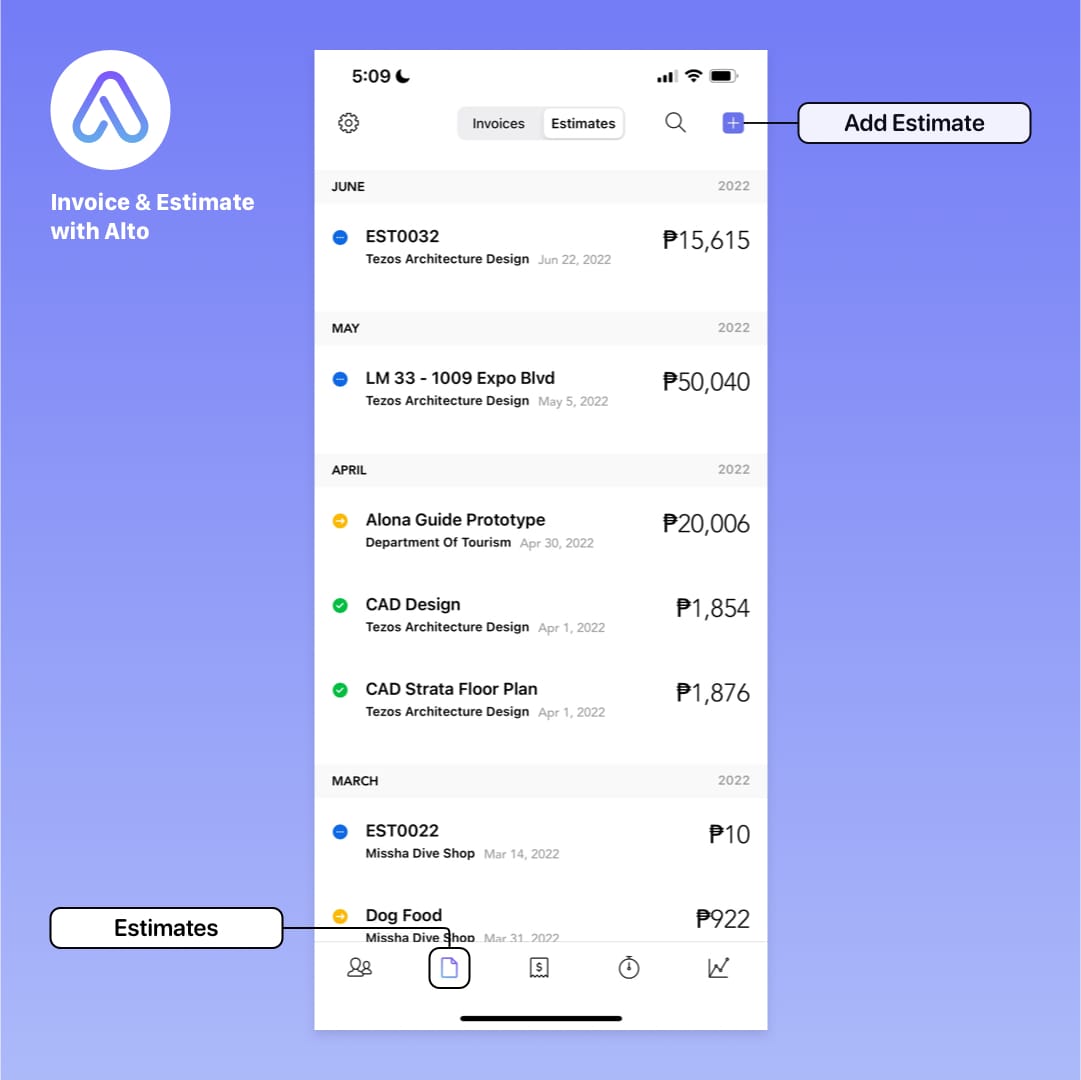
To create a new estimate, click the plus sign in the upper right corner and the New Estimate screen will appear.
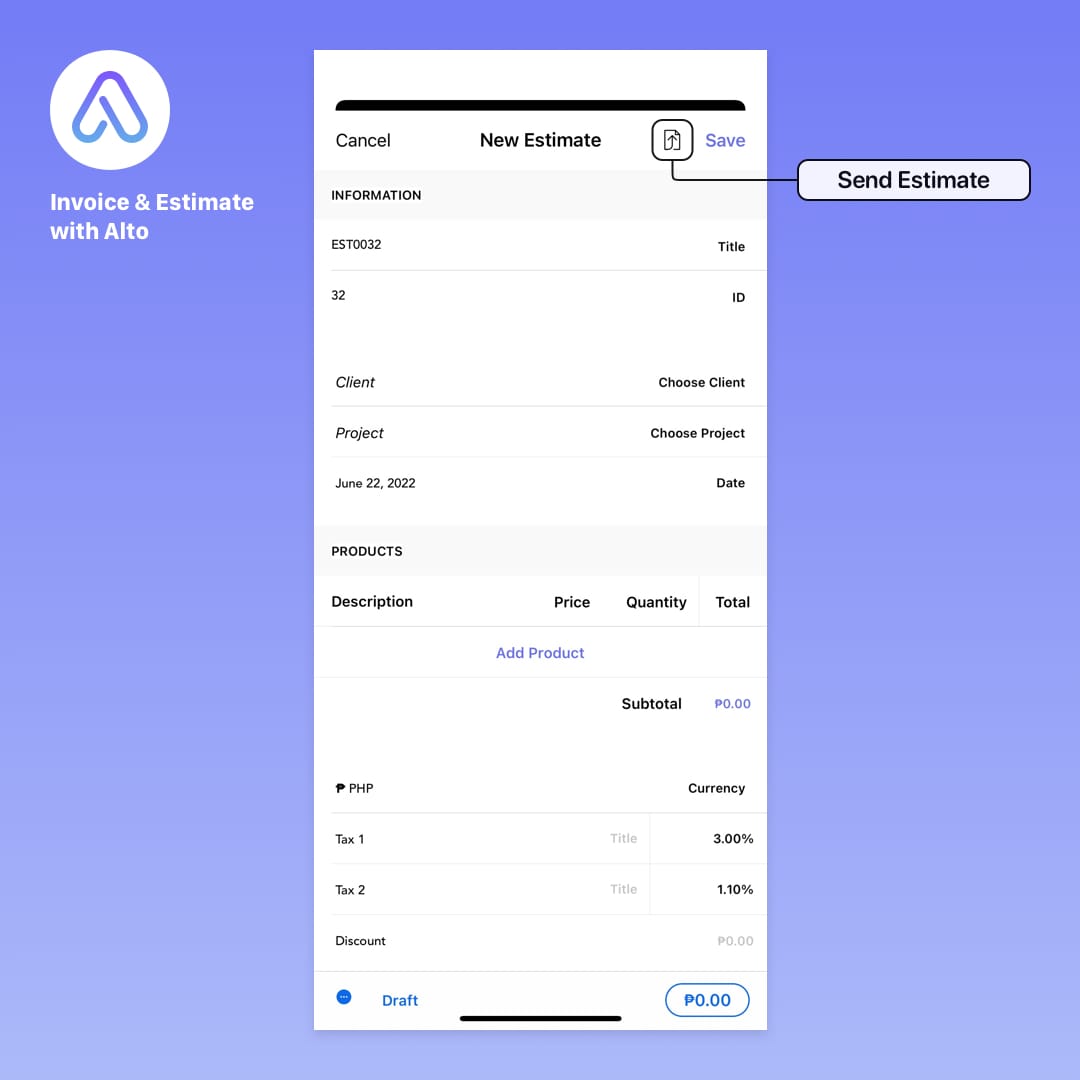
In the Information section:
- The Title is the name that appears in the Estimates List and at the top of the document you’ll provide to the client.
- The ID is for your own internal tracking system.
- You’ll select the Client and Project from popups menus that list your existing sets. If you need to create a new client or project, you can tap the plus sign in the top right corner and add them.
- Set the Date using the calendar popup.
Next we add billable items to the Products section:
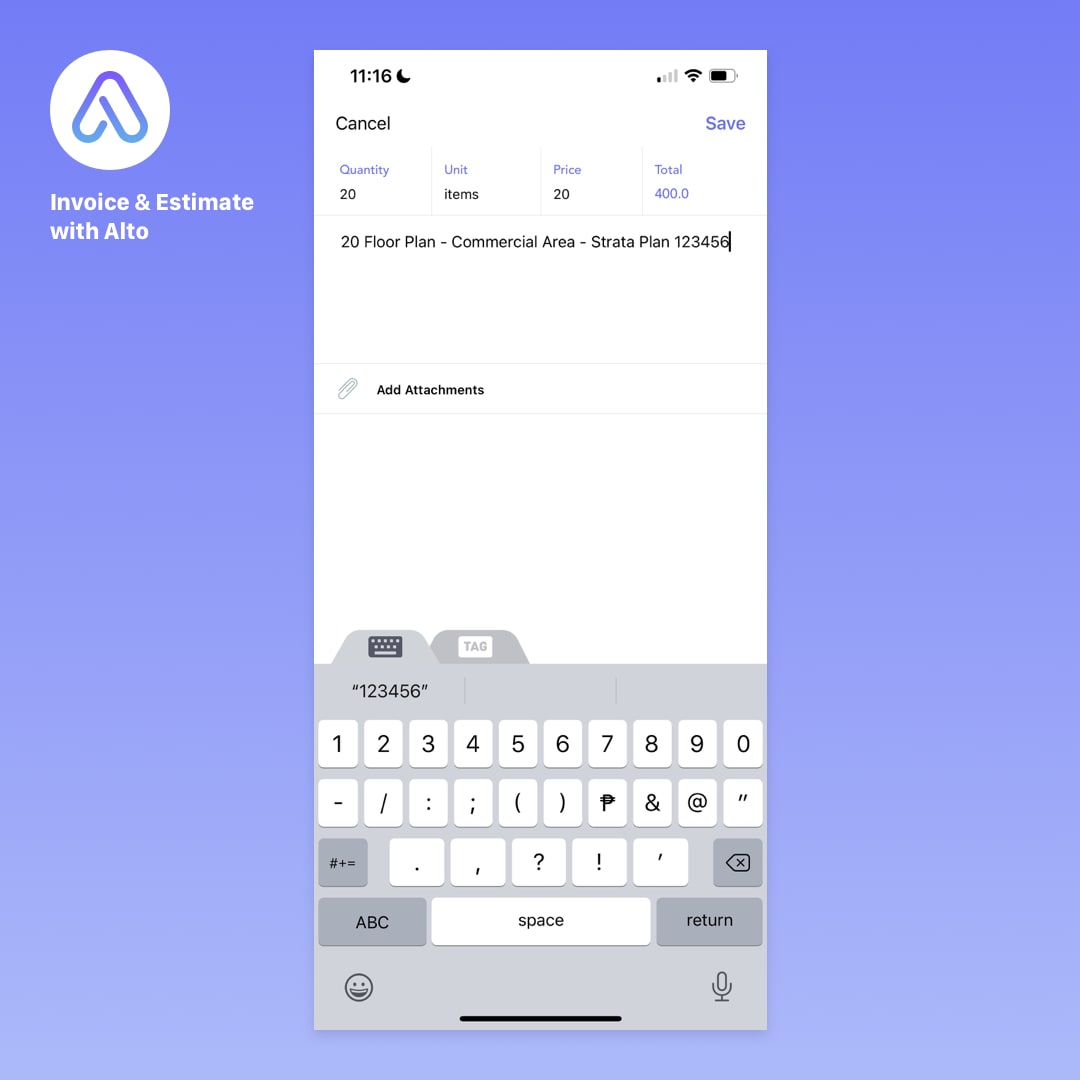
Tap Add Product, and set the Quantity, Unit, Price Per Unit, and Total. You can also enter a Description, and Attachments from Dropbox or your device’s Photos library.
Repeat this process for as many items as needed.
If you’ve already set the Currency and Tax Rates in your Settings, they will be filled in for you. If not, tap them to adjust them.
Finally, if you want to offer a Discount, you can add it at the bottom.
If you want to send the estimate to your customer right away, tap the Send Estimate icon at the top. Otherwise, tap Save in the top right corner and the document will be added to the Estimates list.
Editing an Estimate
When a document is selected from the Estimates list, the Web View or PDF View is displayed. From here you can edit the document or send it to the client by clicking on the large Send button at the bottom of the screen.
Clicking Options at the top right of the screen will bring up a menu of options.
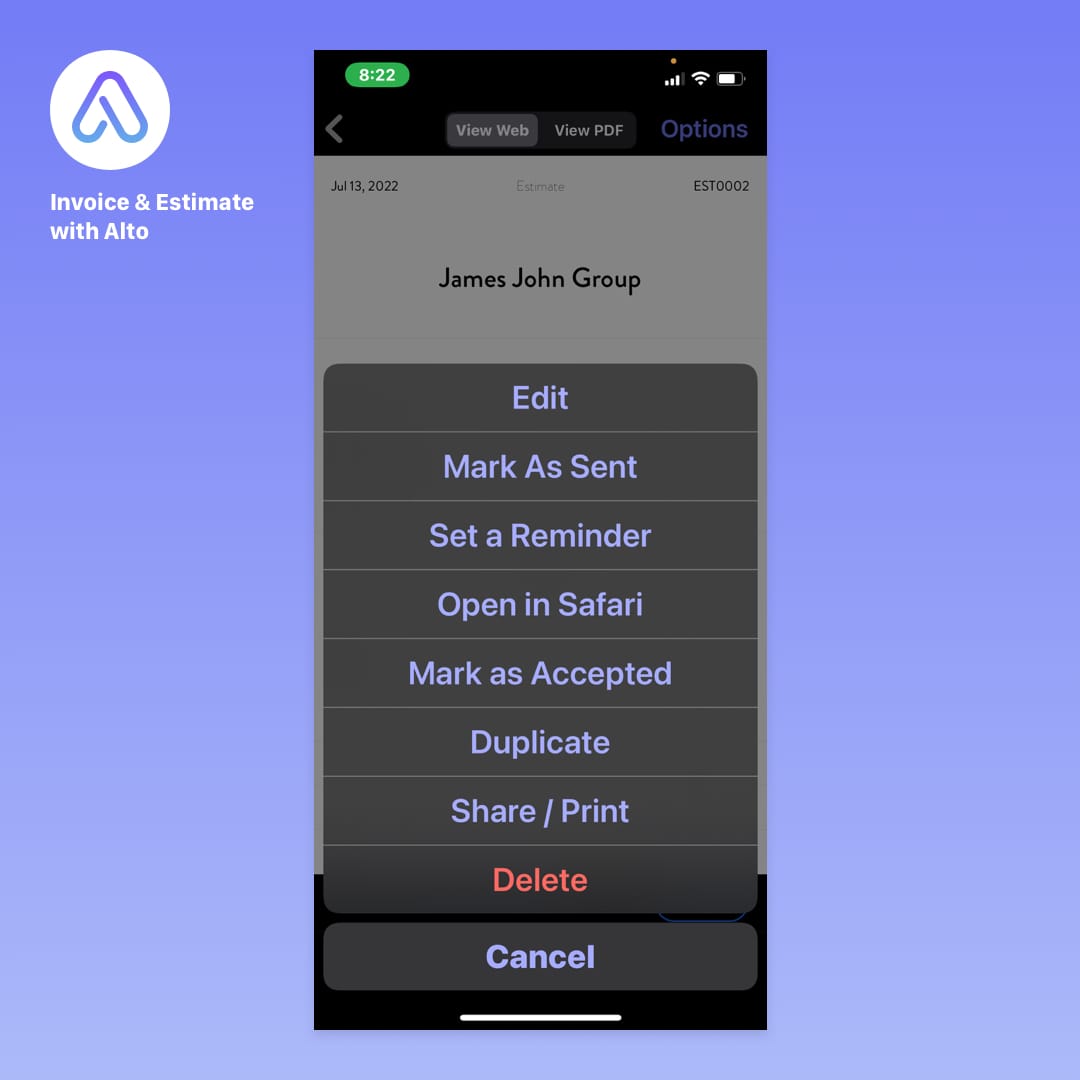
- Edit allows you to either review the estimate before sending it to your client, or make significant changes and resend.
- Mark As Sent changes the status of your document from Draft to Sent (this happens automatically when you tap the Send button, but if you have sent your client a hard copy instead of an email, you can use this button to update the status).
- Set A Reminder opens a pop-up window where you can set a reminder in the Calendar app. Add a description and a date, and your device will alert you to an upcoming deadline or remind you to send the estimate at a certain time.
- Open in Safari launches the default browser and displays a web version of your estimate. You can share this with your team for review.
- Mark As Accepted changes the status of the estimate from Draft or Sent to Accepted.
- Duplicate creates a copy of the current document, making it easy to create new estimates by changing just a few items.
- Share/Print opens the Share pop-up window and gives you access to all the options it contains.
- Delete removes the document from your system
Once you have sent the estimate or tapped Mark As Sent, the menu of options changes slightly.
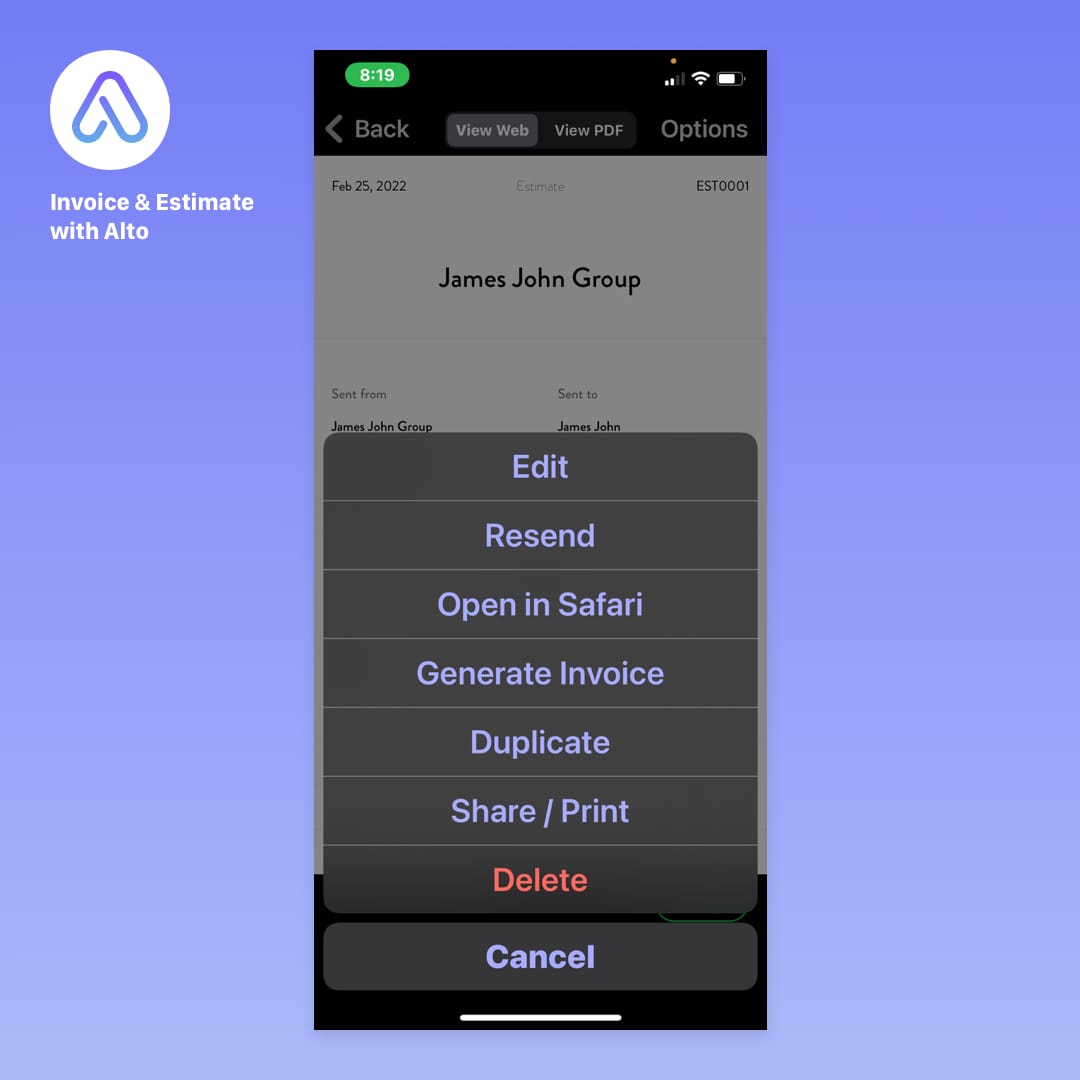
- Mark as Sent changes to Resend.
- Set A Reminder is removed.
- Mark as Accepted becomes Generate Invoice, which allows you to create a new invoice using the information in the estimate.
It’s that simple. You can create complete, professional quotes in minutes, choose from several attractive templates, send them out, revise them based on customer feedback, and then turn them into ready-to-use invoices with the click of a button.
Invoice & Estimate with Alto was built for freelancers, consultants, and small businesses by a team of freelancer and small business founders.
Create your free account today and find out why more than 30,000 freelancers and small business owners love Invoice & Estimate with Alto.
Next: Reports


